August 19, 2014

For You It's Bread, but for Some - It's Life

Yesterday I had the great pleasure of cooking beside a friend, Chef Myke Eggers, who volunteered his time to help prepare the Community Meal at Christ Episcopal Church for those in need through a program sponsored by the Pottstown Cluster.  

We introduced our diners to Indian cuisine.  Chef Myke prepared delicious naan that he baked from scratch.  Naan is a leavened, oven-baked flatbread that is often served with Indian food.


Chef Myke expressed himself beautifully on his Facebook page, that you should follow right now --> HERE


For our entree, we made chicken tikka masala where chunks of chicken are marinated in fragrant spices (coriander and cumin) and yogurt, cooked and served in a creamy tomato sauce over rice.  I adapted my slow cooker recipe found HERE by multiplying the ingredient amounts by 12.  

Chef Myke and my wonderful husband, Bob, prepped the chicken, zucchini (from our backyard garden) and onions.  Iced tea was served, brewed with fresh mint from Chef Myke's garden.


Many returned for seconds, and even thirds. 


Pottstown Cluster board president, Allan Altschull, stopped by to personally thank Chef Myke.


Volunteers make it happen.


Anna and Larissa reminded us to introduce the idea of volunteering at an early age to our children.  Anna (right), who wants to be a cupcake baker when she grows up, baked all of the scrumptious muffins that were served for dessert. 


In the words of Chef Myke,  
"Remember the next time you enjoy your meal to be thankful.  For you it's just bread, but for some - it's life."
No one in our community should go hungry.  Contact the Pottstown Cluster at 610-970-5995 to learn more about how you can help.  

~Merrill

July 22, 2014

Stuffed Zucchini Boats and 6 Other Yummy Zucchini Recipes

This time of year, when our garden is overflowing, we are always in search of delicious and creative ways to prepare zucchini.  This recipe for stuffed zucchini boats hits a home run.  I have my next-door neighbor to thank for the inspiration.  It's super easy and kid-friendly.  Win win! 

On to our stuffed zucchini boats...    


STUFFED ZUCCHINI BOATS

Printer-Friendly Recipe

INGREDIENTS
 
2 large zucchini (or 5 smaller), cut in half, insides scooped out (reserve insides)
1 1/2 cup pearl couscous (sometimes called Israeli couscous)
2 1/2 cups vegetable broth
2 tbsp. olive oil
2 red bell peppers, seeded and diced
3 scallions (green and white parts), diced
1/4 cup portobella mushrooms (or any raw mushrooms you have on hand), diced
1/4 tsp. cayenne
2 tsp. dried parsley
3 tbsp. crumbled feta (you may substitute a dairy-free cheese, like Daiya provolone, for the feta)
2 tbsp. pine nuts, toasted (for topping)
½ tsp. salt, or more to taste (add gradually, thoroughly mixing and tasting each time)
¼ tsp. pepper
Juice of 1 lemon

DIRECTIONS

Preheat oven to 375 degrees.

Add vegetable broth to large pot and bring to a boil.  Add couscous and a pinch of salt to pot.  Reduce to a simmer and cover. Cook 10-15 minutes, until all veggie broth absorbs.

Trim the ends off zucchini.  Cut zucchini in half lengthwise, then scoop out pulp, leaving about 1/2 inch shells.  Finely dice pulp and place in bowl.  Set aside.

Warm a large skillet over medium heat, then add 1 tbsp. olive oil.  Once oil is hot, add red peppers and scallions.  Cook and stir occasionally, until peppers soften, about 8 minutes.  Add remaining 1 tbsp. olive oil, mushrooms and zucchini pulp and cook another 3-5 minutes.  Season with cayenne, parsley, salt and pepper.  Remove from heat, then add couscous and mix.

Heat a small skillet over medium-high heat, then add pine nuts.  Toast until golden brown, flipping pan occasionally, about 3-5 minutes.

Divide couscous mixture evenly among zucchini. Top with crumbled feta and toasted pine nuts.

Line two baking sheets with parchment, or lightly spray the baking sheets with cooking spray. Place zucchini on tray then put in preheated oven for 25 minutes until zucchini softens.  Once cooked through, remove from oven.  Squeeze fresh lemon juice on top of all zucchini.

Serve and enjoy! 

Here are six additional tried and true zucchini recipes:


Fried Zucchini with Creamy Horseradish Dipping Sauce (my favorite!  I could eat the dipping sauce with a spoon! 


Quinoa Casserole with Zucchini (super versatile, and it's vegetarian, or vegan, and gluten-free) 

Panang Curry with Zucchini (you'll never miss the meat)

Fresh Roasted Tomato Pasta Sauce (a great way to use your garden veggies, and freezes nicely)

If you have a zucchini recipe that you love, please share it with me!

Happy cooking,

~Merrill


May 28, 2014

DIY :: How to Make a Photo Strip

Photo craft projects are some of my favorites.  If you are looking for a heartfelt gift for a friend or family member, a handmade photo strip may just do the trick.

Photo strips are a great, inexpensive way to memorialize a wedding, baby's birth, shower, pregnancy, graduation or as a treat on a birthday, Valentine's Day, Mother's Day, Father's Day, an anniversary or Christmas.  The possibilities are endless.  They are super easy to make and, best of all, you can use your home printer. 


What you will need:
  • White card stock, 1 sheet
  • Black card stock (or the color of your choice), 1 sheet
  • Scissors
  • Paper cutter (optional, but makes the job go more quickly)
  • Adhesive (I looooooove this glue)
  • A recycled jewelry gift box, or even a little bag
  • Digital photos
  • Computer
  • Google's Picasa, or other photo editing program
  • Printer


I also used a scoring board that I bought at a local craft store with a coupon.  If you have one, use it, but don't buy it for this project. 


Choose your photos.  This takes the most time.  I selected "save as" and saved each contender in a folder on my desktop.  I then edited each using Picasa, a free program by Google.  You can download it HERE.  It allows you to crop, resize, darken, lighten and convert your photos to black and white, or sepia.

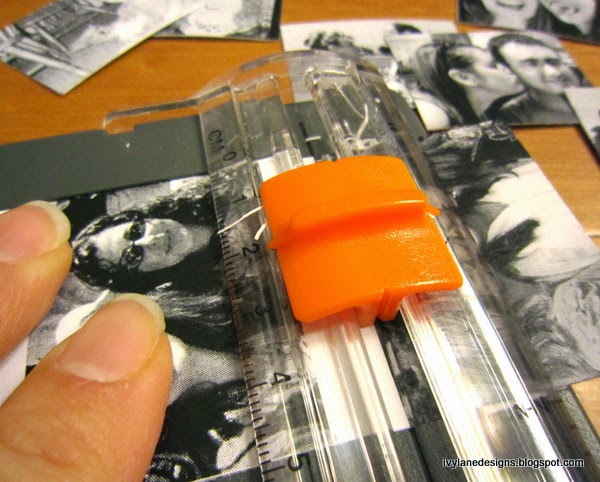
After selecting, editing and printing your photos on white card stock, cut them out so that they are uniform in size.  Place them in a row on your black card stock so that you know how many fit.  Or, you can do math.  Cut out your strip of black card stock and fold it like an accordion, making sure that one photo fits in each frame.  Use glue to adhere your photos; one in each frame.


Your super cool photo strip should look something like this.


Place your fabulous photo strip in a gift box or bag, along with some paper grass, and perhaps a piece of candy and a silly toy.


Wrap with ribbon or baker's twine, add a little note and watch the recipient's face light up with glee when he or she opens their little handmade heartfelt photo strip gift.


For more photo craft ideas, follow my Pinterest board HERE.

Happy crafting!

~Merrill